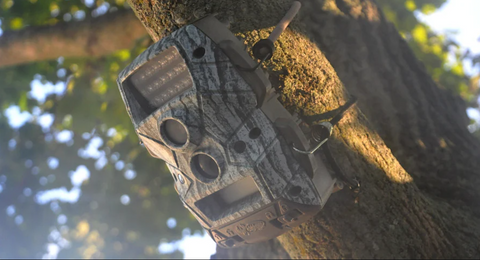
Trail cameras are used by hunters and animal lovers alike to keep tabs on nature. They can be set up almost anywhere, and, using inbuilt motion sensors, the camera is triggered, whenever something in the vicinity moves. It’s perfect for tracking animals from a distance, but with nobody watching. Sometimes these cameras capture more than their owners bargained for.
Capturing animals doing interesting things at the right moment is not an easy feat. That's why many animal enthusiasts always keep their cameras and smartphones within reach. Unfortunately, that’s not always practical. And that is where trail cameras come into play.
Let’s check out some of the weirdest things ever captured on trail cameras.
1. Bucket on the head!
Deer are some of the world’s most majestic animals, but sometimes their own antlers can compromise their dignity.
Like this guy who really decided to put the buck in the bucket.
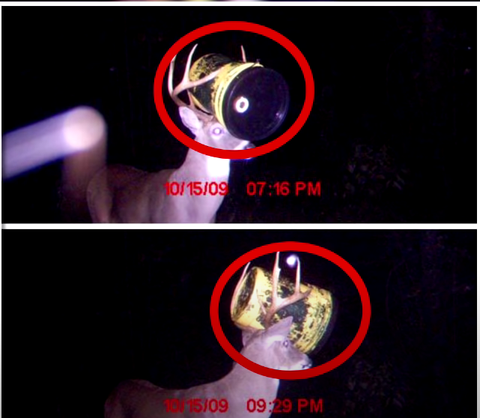
Apparently, his neighbor, an avid hunter, was baffled when he found the bizarrely comical moment on the trail camera he used to see what wildlife frequented the local area. After all, carrying around the burden, potentially for months as far as we know, isn’t exactly the usual way of completing your bucket list.
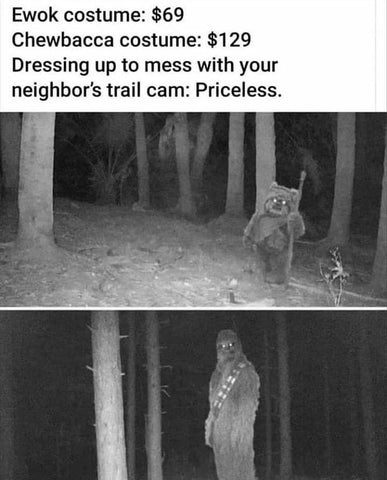
2. Weird human or ghost?
When your neighbor just figured out that you set up a trail camera in the wood, he probably would dress up in front of the camera and just mess up with you.
And sometimes, when we found some really weird human in the pictures, would we think about is a real prank or something supernatural that we don't understand?

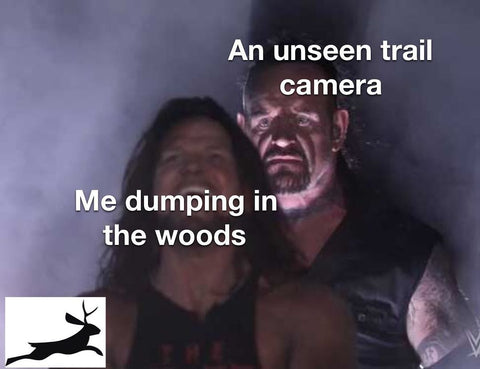
3. Natural relief
Sometimes when nature calls, you have no choice but to answer. Since animal can do whatever they want, there is a lot of chances to see the process of a natural relief.
This can be happened to human too...
Remember, if you ever caught off short, always check for camera’s first.
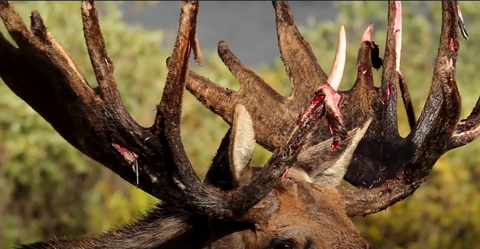
4. Don't moose with me!
Although it looks like this demonic moose just headbutted its way out of hell, the truth is that he’s just growing into his antlers. The strange draping you see hanging off the bloody antlers is called velvet, a soft skin that coats the antlers that moose shed as they gain more testosterone during mating season.
Eventually the structure beneath hardens to bone and when the season is over he’ll literally shake the outler layers off.
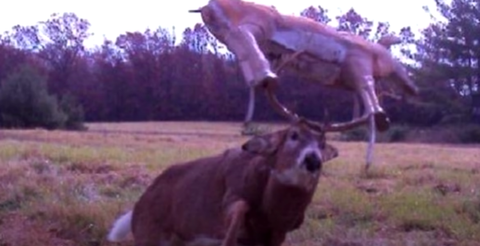
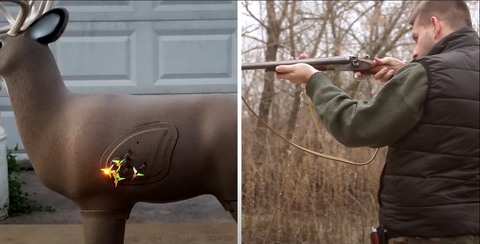
5. Target Practice
If you thought a deer with a bucket in its horns was madness, take a look at this poor guy. This white-tailed buck appears to have tried his hand at a little target practice. Target deer designed to help improve Hunter’s aim. But this deer seems to get confused and charged a target deer assuming it was a rival, leaving it stuck in his antlers.
Besides coming across this legitimately weird stuff, our main target will still be a decent deer shot or any wildlife that wandering in the real world outside. So here are 5 Basic Tactics that you need to know for Setting up a Trail Camera.
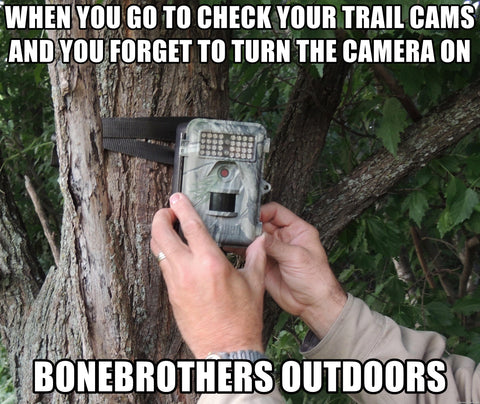
1. Turn the camera ON before you leave the area.
You don’t want to spend time traveling back and forth just to see a camera off and waste a few weeks while expecting some decent shot.
ON - OFF -SETUP
These toggle switches have three options: On, Off, Setup. When I am setting up my Campark trail camera the switch is pushed all the way to the right. Once I have my settings where I want them, I have moved the switch all the way to the left, in the “on” position.
Otherwise...
2. Set the camera at a proper height.
Setting up trail cameras for whitetail deer or other game is not difficult. Whether you are hanging one trail camera or 10, both orientation and height have to be just right. As a hunter, we’re used to seeing everything at our own eye level, but that’s not where we want our trail camera pictures taken.
Once you have your trail camera location and decide on the right height, you’ll want to make sure you’re getting the best trail camera pictures possible. This means avoiding lens flare because of interference from the sun. Never point a trail camera due east or west because the sunrise and sunset will often blow out an image. South-facing can also cause problems because it’s in the sun all day.
The best tactic is to face your trail cameras north whenever possible.
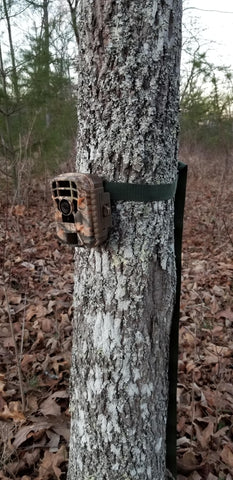
Trail camera height depends if I run them on private or public land. Our private land cameras are all chest high, but our public land cameras we either hide better or elevate a good bit and face them down to keep them out of others’ hands and line of sight. Every camera we set, we go where I’m expecting to catch animals and look at the camera to make sure it is aimed well and catches my movement.
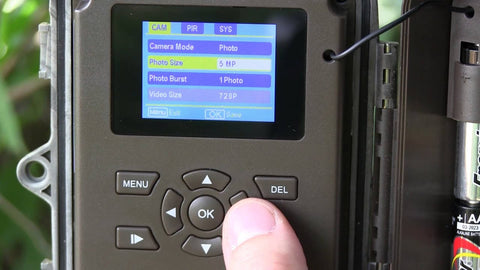
3. Figure out all settings in the trail camera.
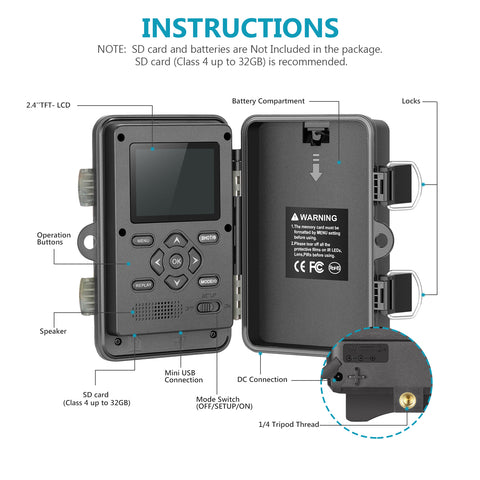
Too many mistakes are made when it comes to understanding and using the right trail camera settings. Make sure you spend a day with any new trail camera so you know all its capabilities before leaving it in the woods. If you are having a hard time figuring out all these settings, you can check out the PDF manual here for all kinds of Campark trail cameras. Knowing the camera well will help you to capture the best shot and save more precious time.
4. Leave it alone
One of the biggest mistakes trail camera users makes is a lack of control when checking their camera for images. Sure, it’s exciting to pull SD cards and see big antlers on your computer screen. But if you are making frequent trips to your camera, you can expect the action to eventually slow down or even stop as it will sacre off your bucks. Try spreading out your camera checks and resist the urge to visit them too often. The result will be less pressure on the very buck you’re chasing. And as you already know, mature bucks don’t respond well to the pressure of any sort.
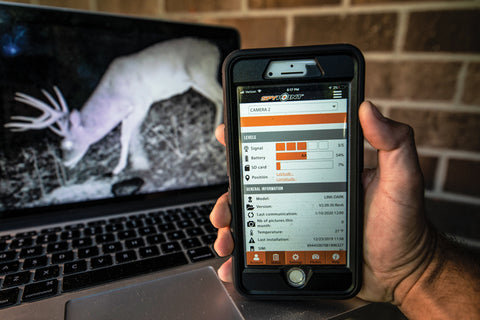
5.Using Hunting camera Pro APP with Trail Cameras
With these top tactics, your trail cameras will give you the advantage you’re looking for in the field, but pair your Campark trail camera with the Hunting camera App and these key features and you’ll be chasing whitetails just like the pros.
You can easily check the captured picture remotely or download the footage that the camera just took within a limited distance. Transfer the pictures and the footage to your mobile phone and start to edit them or clear out the SD card space for more decent shots.
Conclusion
Trail cameras are a great scouting tool. However, with a little forethought and preparation, you can raise their level of performance no matter what camera you use!