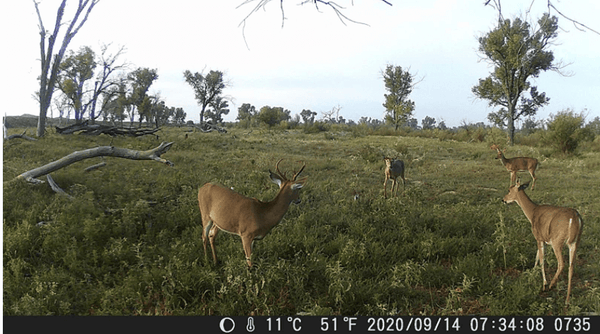
You'll probably invest a lot of money on a hiking camera however, it's worthwhile! Trail cameras, also known as "Trail cameras" to shorten them, are weatherproof batteries that can take videos and photos when they are triggered by motion. It is ideal that the motion originates from animals, however trees moving in the wind, or snow falling from the treetops could cause a photo.

In reality you could see a lot of "empty" images. This is fine, but the ultimate reward is capturing the perfect image of two bucks locking antlers , or discovering that bears can be found in your favorite forests! Let's talk about ways to begin.
The first thing you'll need is the camera for your trail. In order to test it, you can keep camera equipment in woods throughout the year and they will have to endure the heat of summer, the cold temperatures of winter, and all between. Trail cams cost you between $100 and $250. The easiest method to study the cost is to look them up here...

The majority of trail cams today come with the following characteristics:
- Capture both videos and images (with audio) on an SD card.
- powered by AA batteries generally 4-8. Based on the quantity of videos and photos taken in a day, batteries can last for many months.
- The shutter is activated by heat or motion.
- Night and day vision is supported (night time photos or videos are available in the black or white).

Here are some camera placement tips:
- Attach the camera to a tree which is reasonably straight or else your videos and photos are likely to be off-center. You'll be amazed at by how difficult it is to locate the right tree.
- Check for branches that block the lens' view.
- The camera should be pointed upwards or downwards on the game trail to increase the amount of time in the frame. A trail shot typically produces only one photo.
- If you're in an open space make sure you don't point the camera towards the sun's rising or setting. Nothing is more embarrassing than a blurred image due to the sun's rays shining directly on the lens.
- A best practice is to set the cam at waist level. If you place it too low, you'll miss heads of larger animals such as deer and Elk. Too high and you'll miss smaller animals such as bear, cougar, and coyotes.

Most trail cameras allow you to capture videos and pictures. Certain cameras, such as the Campark offer an option to set the camera up to take an image and then create videos. It's the ideal of both.
Videos, in addition to being thrilling to watch, are also beneficial to capture the movement of an animal. The duration of the video can generally be set from 30 and 60 minutes. The images of animals moving are often blurry in dim lighting conditions, and can result in only taking just a tiny part of the animal's body before they leave the frame.

Knowing these tips and tricks is part of the enjoyment. You'll soon realize that just one camera isn't enough , and within a short time you'll be trekking through the woods, taking SD cards from several cameras that you've setup. In any case, trail cameras are a fantastic excuse to go out for a walk and discover what's hidden in the forest!
